
So….I’ve become a ginger.
Okay okay that’s a bit of an exaggeration, but I now have a red tint to my hair!
I’ve been wanting to change up my hair for a while now. I had been toying around with the idea of bleaching it or getting it chemically straightened but both of those treatments would have literally killed my hair. Like I would now be bald if I had tried to get my hair to be anywhere close to the blonde that I adore so much. *yikes*
And of course both of those methods require a lot of intensive chemicals that I would rather not put so close to my brain.
So I did some research on natural hair dye methods and I read a lot of positive reviews on Lush’s henna hair dye. It’s all natural and really inexpensive compared to going into the salon and getting your hair colored!
I went into the Lush on Oxford Circus (holy crap this place has THREE stories filled with amazing goodies; it took every ounce of willpower not to go on a spree) and talked to a sales assistant about which color I should go with. Since my hair is so dark to begin with she recommended I go with the Rouge to get the most dramatic difference. Marron is another reddish option but is more brown with a subtle hint of red.
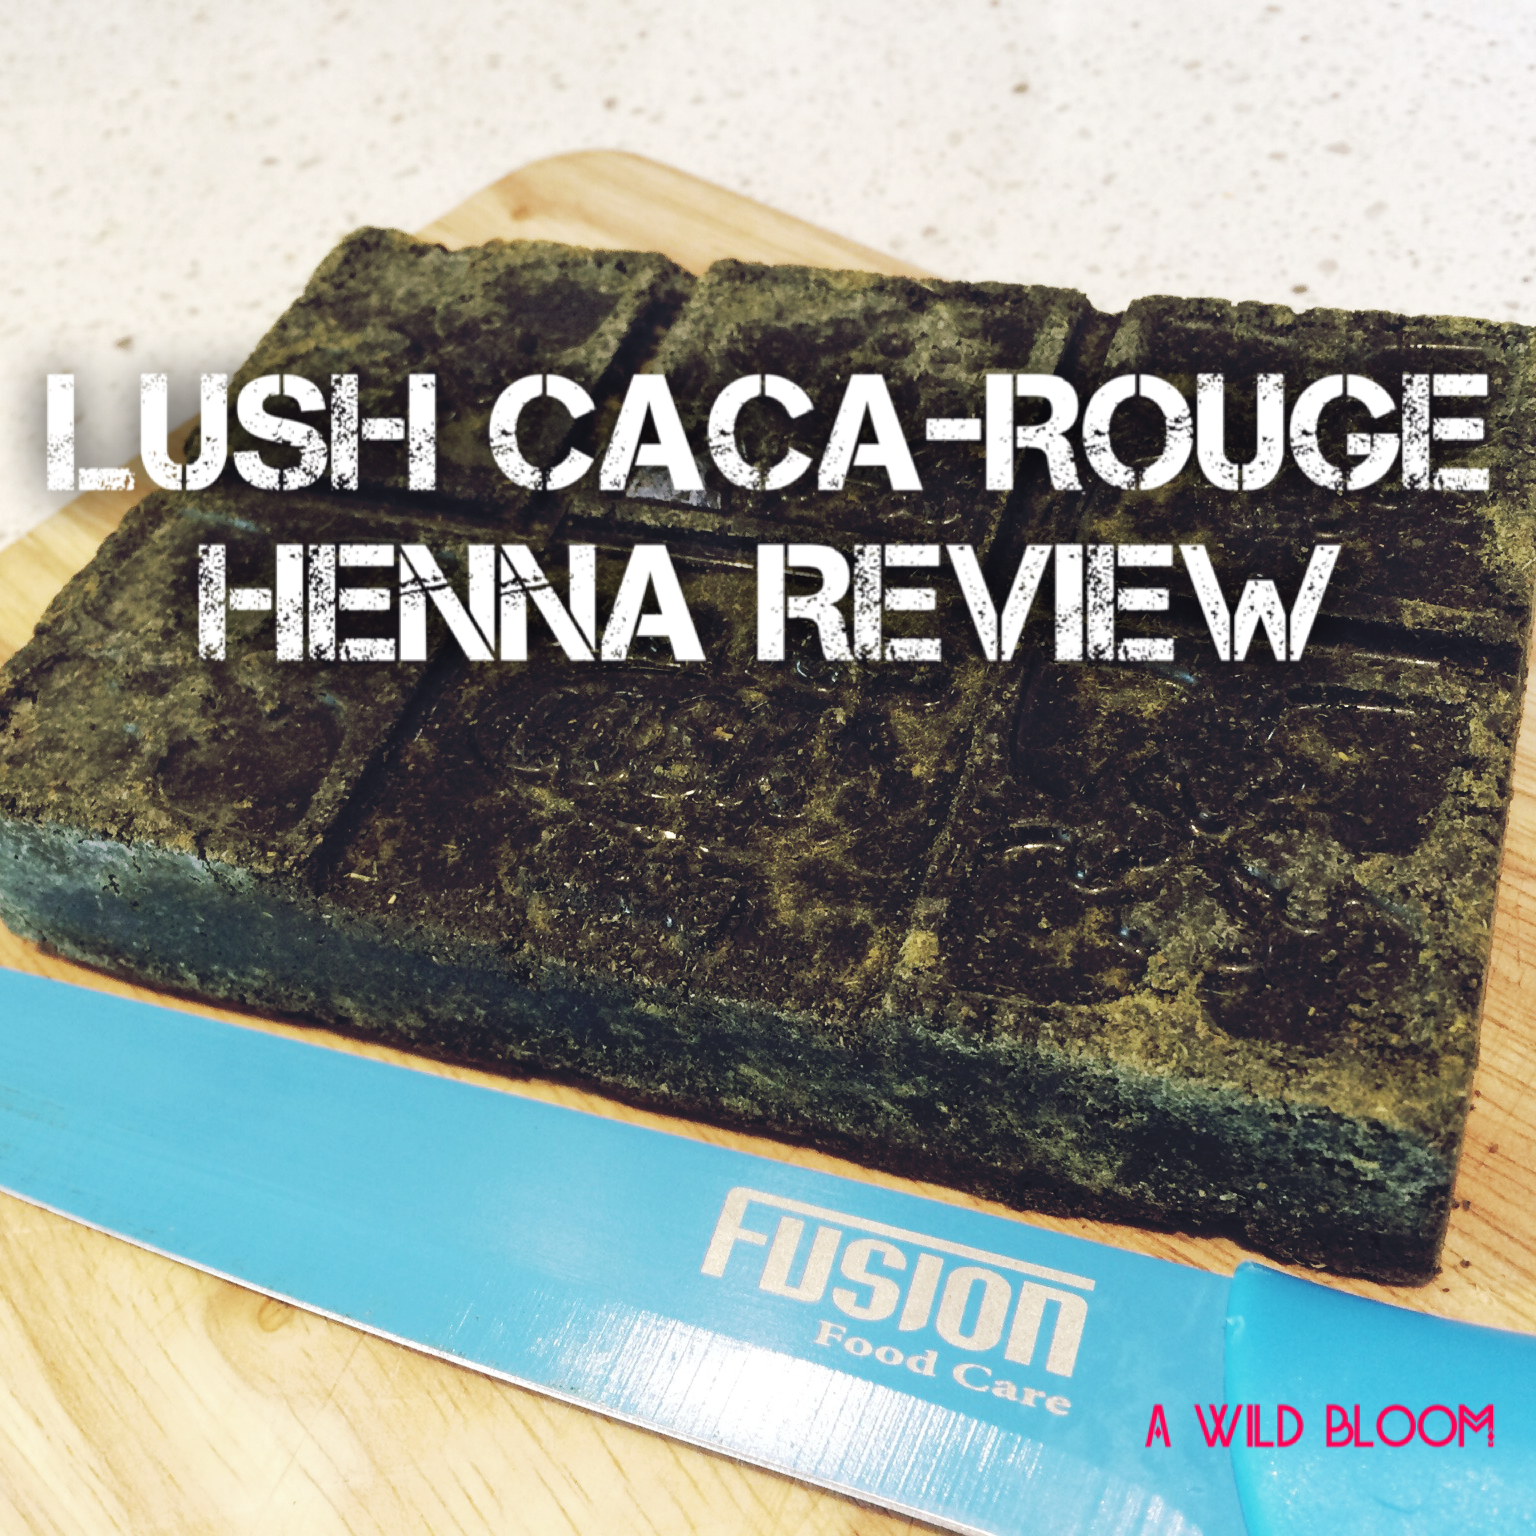
I was sold! I walked out with a brick of Caca Rouge, and a couple of other goodies I couldn’t resist! (P.S. the henna bricks smell AMAZING. I was smelling my purchase all the way home!)
Here’s what you’ll need to get started:
- Lush Henna
- Rubber glovers (the cashier at Lush gave me a pair with my purchase)
- Coconut oil
- Boiling water
- Glass bowl
- Small pot that your glass bowl will fit into
- Mixing spoon (I used a plastic fork)
- Old shirt you don’t mind getting ruined
- Lots and lots of newspaper to cover the floor
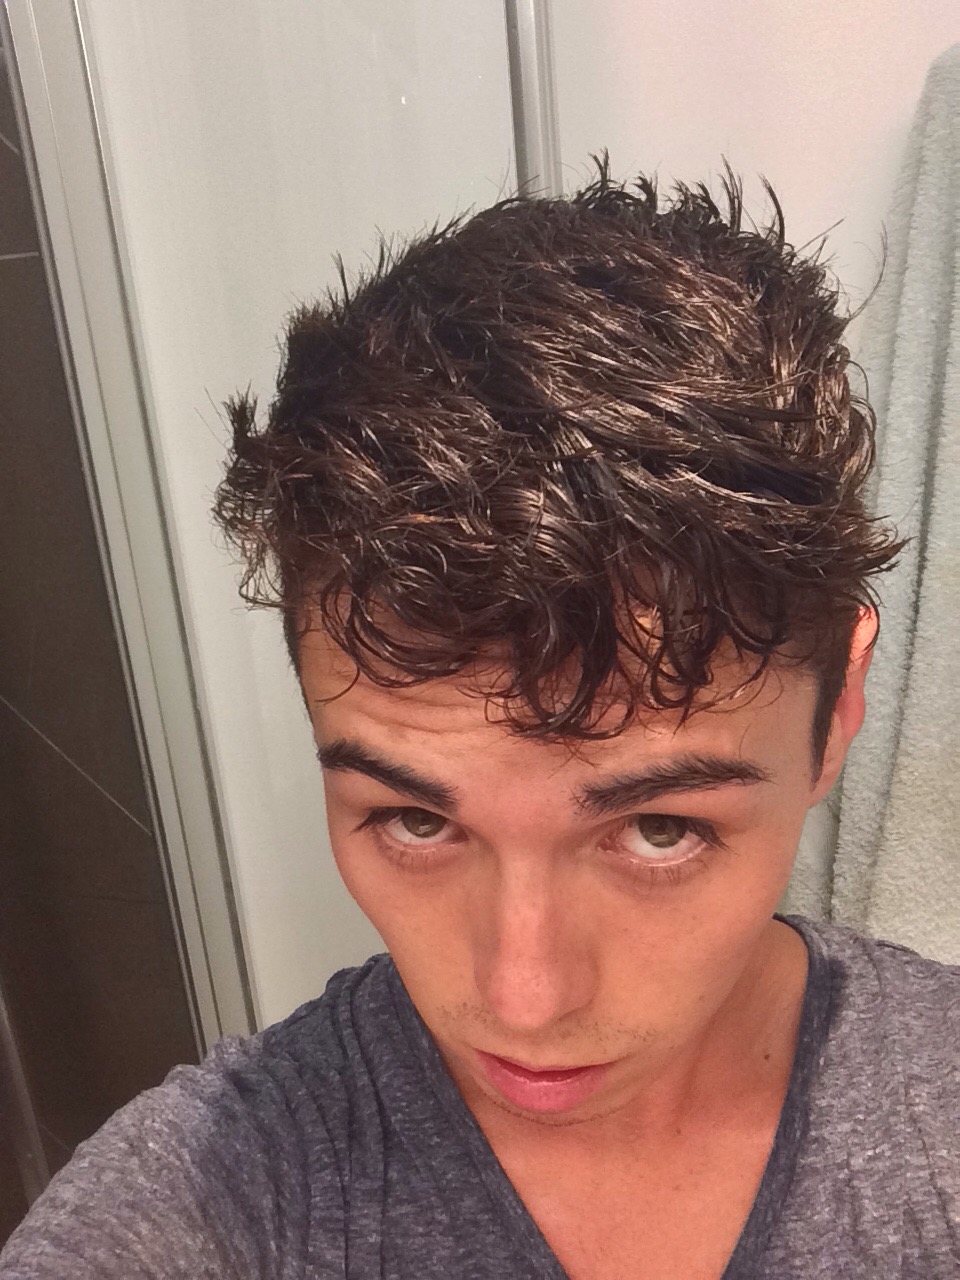
This is my hair when I started:

Now here’s how to apply the henna:
- Start with clean, completely dry hair, and put on your old shirt.
- Boil some water in your pot.
- Chop your henna into chunks while your water boils (I used 2 squares from the block) and place into your glass bowl.
- Once your water is boiling pour over the henna so that it covers it completely. Let stand for a couple minutes.
- Mix the henna until you get a smooth, thick hot chocolate consistency, gradually adding more water as needed. Be careful not to make it too thin or else you will need to add more henna.
- Once your henna is smooth, make sure there is about 2 inches of hot water in your pot and place your bowl into the pot (this is to keep the henna nice and hot while you apply; the hotter the henna the better the color will turn out!).
- Now get your coconut oil and apply it along your hairline, ears, and back of your neck to prevent the henna from staining your skin.
- Get your gloves on and begin applying the henna to your hair starting from the back and working your way forward.
- This will get very messy, chunks will fall off your hair and onto the floor, just keep smoothing the henna on starting from the roots and working it into the ends.
- If you have really short hair anywhere like I do on the sides, don’t bother trying to dye that part cause it won’t really show up.
- Once you’ve completely covered your hair either saran wrap your head or put on a tight shower cap you don’t mind throwing away.
- Leave the henna on anywhere from 1-6 hours, blowdrying your head every 30 minutes or so to keep the mixture warm on your head.
- Get in the shower and rinse rinse rinse! I only had to shampoo once to get it all out of my hair.
- Admire your new hair color!

looks gross right?
right out of the shower
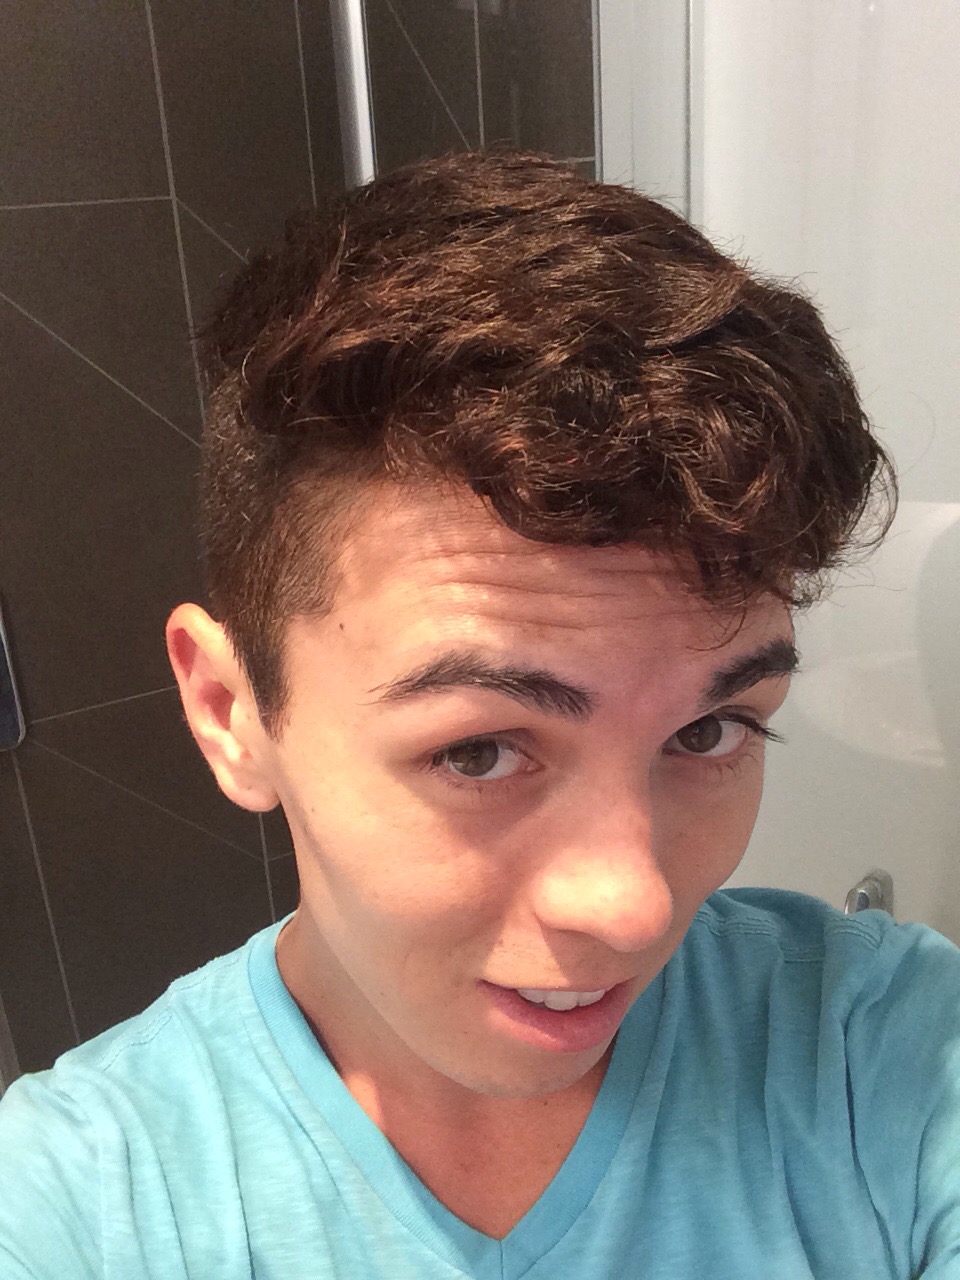
ta-da! 24 hours later
I have to say I was pleasantly surprised with how well the color showed up on my dark hair. I wasn’t expecting as much of a difference as it made! It also made my hair uber soft due to the cocoa butter used in the formula!
Pros:
- inexpensive
- natural
- works well
- conditions hair
Cons:
- messy
- a little difficult to apply
Have you ever used henna hair dyes before? How did it work for you?
Hope this review helped you! xoxo
Note: I’m going on my honeymoon for the next two weeks so I’ll be MIA until then! Bye bye London, hello Mediterranean! Xoxo

wow!!! It worked.. Haha cute 😛
LikeLike