

Happy New Year darlings!
My goodness the past few months have been INSANE right?! Between the holidays and the election results and the insane amount of dancing I’ve been doing (which I’m super grateful for, by the way) I have completely neglected this little ray of sunshine of a blog. But I’m back and I hope that you are finding as much inspiration and strength in all aspects of your life as I am this new year!
Alright so let’s get down to it. Here’s what my kitchen cabinets looked like before the transformation:
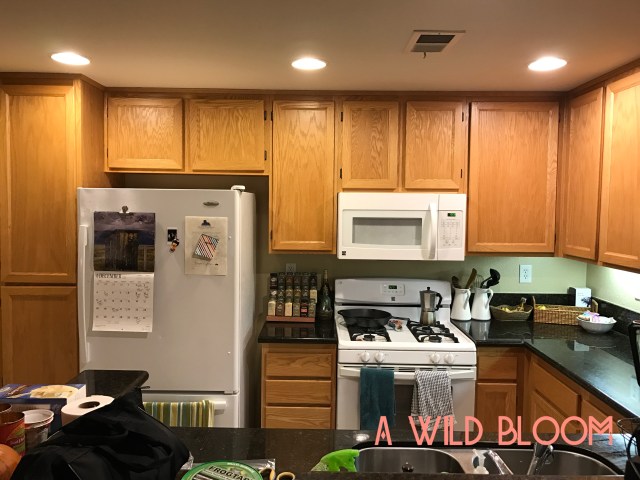
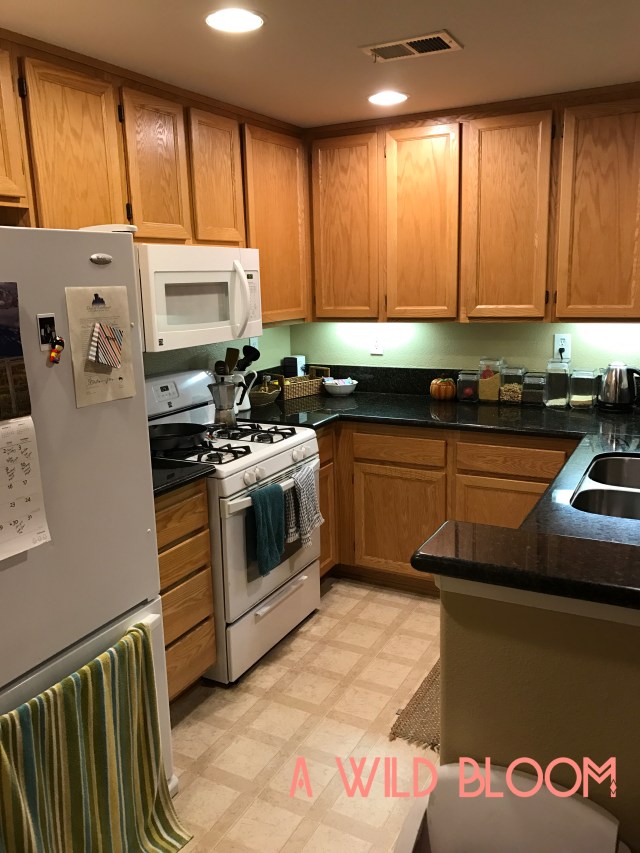
BASIC. BLEH. BORING. A HOT MESS.
They are original to the condo and John refused to let me do anything to them in fear that it would make them “less appealing and harder to sell the place if we ever wanted to.” So I was on a mission to make him eat his words 🙂
And here’s the after:
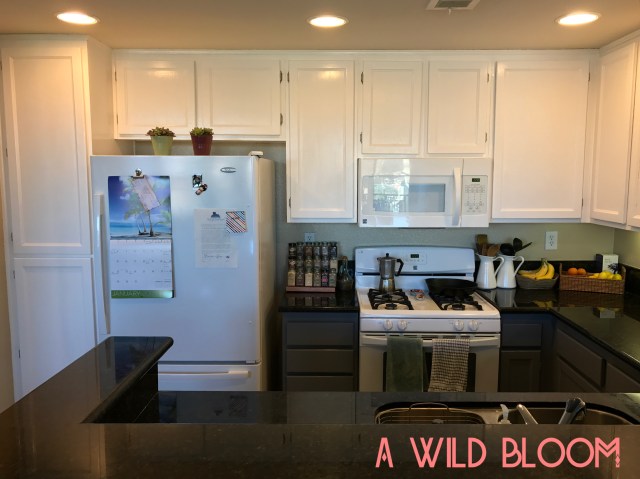
Dramatic right?! Bye bye drab, hello fab!
I wanted to do a two toned cabinet scheme and decided on the colors Crystal Cut for the top cabinets and Magnetic Gray for the bottoms, both by Behr.
The project took me a solid 14 days in total with painting around 6-8 hours each day. YEAH. It was insane. Luckily John was back home in New Hampshire for the holidays and I had a lot of time off from work so I was able to do it rather quickly. Trust me, the time is SO worth it for the end result!
Here’s what you’ll need:
- Liquid Deglosser
- Painters Tape
- Primer
- Paint
- Topcoat
- Foam Rollers
- High Quality Synthetic Brush
- Tarps
- Clean Rags
- New Hinges (optional)
- A bunch of TV shows on Netflix to binge watch
Here’s how I did it:
- Start by clearing your work space and laying down tarps everywhere you will be painting. Trust me you will get sloppy and drip everywhere.
- Remove all of your doors and drawers from the cabinets and place the screws and hinges into some tupperware or plastic bags to keep them organized.
- Find areas in your home to lay all of your cabinets. I elevated my doors with random cans of food or boxes of pancake mix, really anything that would keep my doors off of the floor and stable as I painted.
- If your cabinets are particularly dirty give them a solid cleaning with some cleaner and a rag.
- Degloss EVERYTHING with a rag and make sure you wipe down every single surface.
- Tape off walls and floors with tape to protect areas you don’t want to get paint on.
- Now you get to prime! Use a foam roller and your synthetic brush to lay down a nice thick coat of primer over everything. Allow to dry.
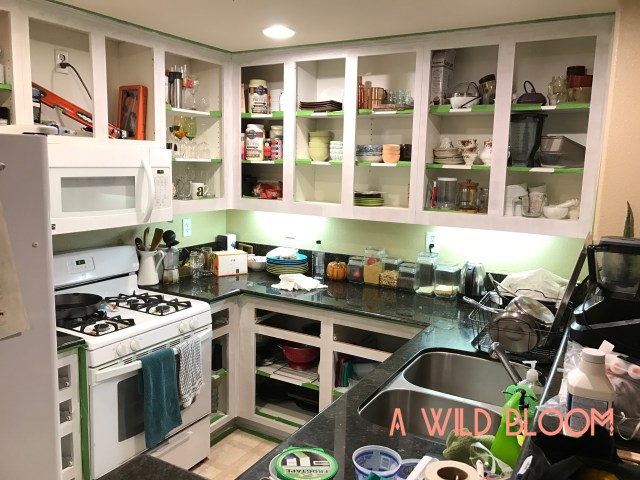
- Now comes the time consuming part. The paint. I had to do 3 coats for the white cabinets and 2 coats for the gray. This takes forever when you have to allow one side to dry before you can flip your doors over to do the backside. But stay diligent and be sure to apply even coats and to check for drip marks as you go. This is where the Netflix shows will come in handy because the work is so monotonous and time consuming. I finished 4 series by the time I had finished!
- Once you’ve finished all of your paint coats, now we have to seal and protect that beautiful color! Apply your topcoat according to that brand’s instructions. Mine required three coats and to be applied with a synthetic bristle brush, no roller. If you use a roller you’re going to get bubbles and an uneven texture.
- Now the easiest part, allow your topcoat to cure. Take a break, you deserve it you’ve been working like mad!
- Apply clear rubber stoppers to prevent your doors from scratching when they close.
- Paint your hinges if necessary, and begin reinstalling the doors and drawers. This step is so satisfying as you begin to see the final product come together so quickly!
- Remove the painters tape and do any touch ups as necessary.
- YOU’RE DONE!
Now go get a massage and treat yourself because that was A TON of hard work!

I am beyond ecstatic with the final result and couldn’t be happier with how much the paint brightened, opened up, and updated the whole kitchen! And all for under $300! This experience also made me fall in love with how moody and grounding gray can be. ❤

Now here are some little tid-bits to help you prepare yourself for your kitchen transformation:
- This WILL take you an extremely long time to complete. Make sure you set aside ample time where you can live without your house because the cabinets will take over.
- The paint lady at Home Depot said I was going to need 2 gallons of paint to cover my top cabinets and a whole gallon for the bottom. She was SO wrong. I used a little more than a half gallon for the three coats on the top cabinets and about a quarter gallon for the bottom. It doesn’t hurt to have extra for touchups but seriously?
- Keep your receipts because I was able to return over $100 worth of supplies at the end!
- When applying your topcoat it is very easy to slap on too much and drip marks will happen as soon as you walk away. Apply thin coats and triple check for drips because they sneak in there. And honestly after you’ve been painting for a week straight the last thing you want to do is be precise but if the drips harden they won’t sand off without taking the paint with it and they will be visible when you hang the cabinets up.
- When I removed my painters tape, I had created such a thick layer of paint that I had to score along the tape with a knife to get it to come off. And to my dismay it ripped off parts of the paint with it. I was freaking out, but honestly you just go back in and touch up with a small paint brush and it’s like it never happened.

If you decide to paint your kitchen cabinets I would LOVE to see some before and afters! It is honestly such a cost-effective way to create a huge dramatic change to your home, if you’re willing to put in the work. 😉
xoxo
