Here’s another DIY project I took on this last week to share with you guys.
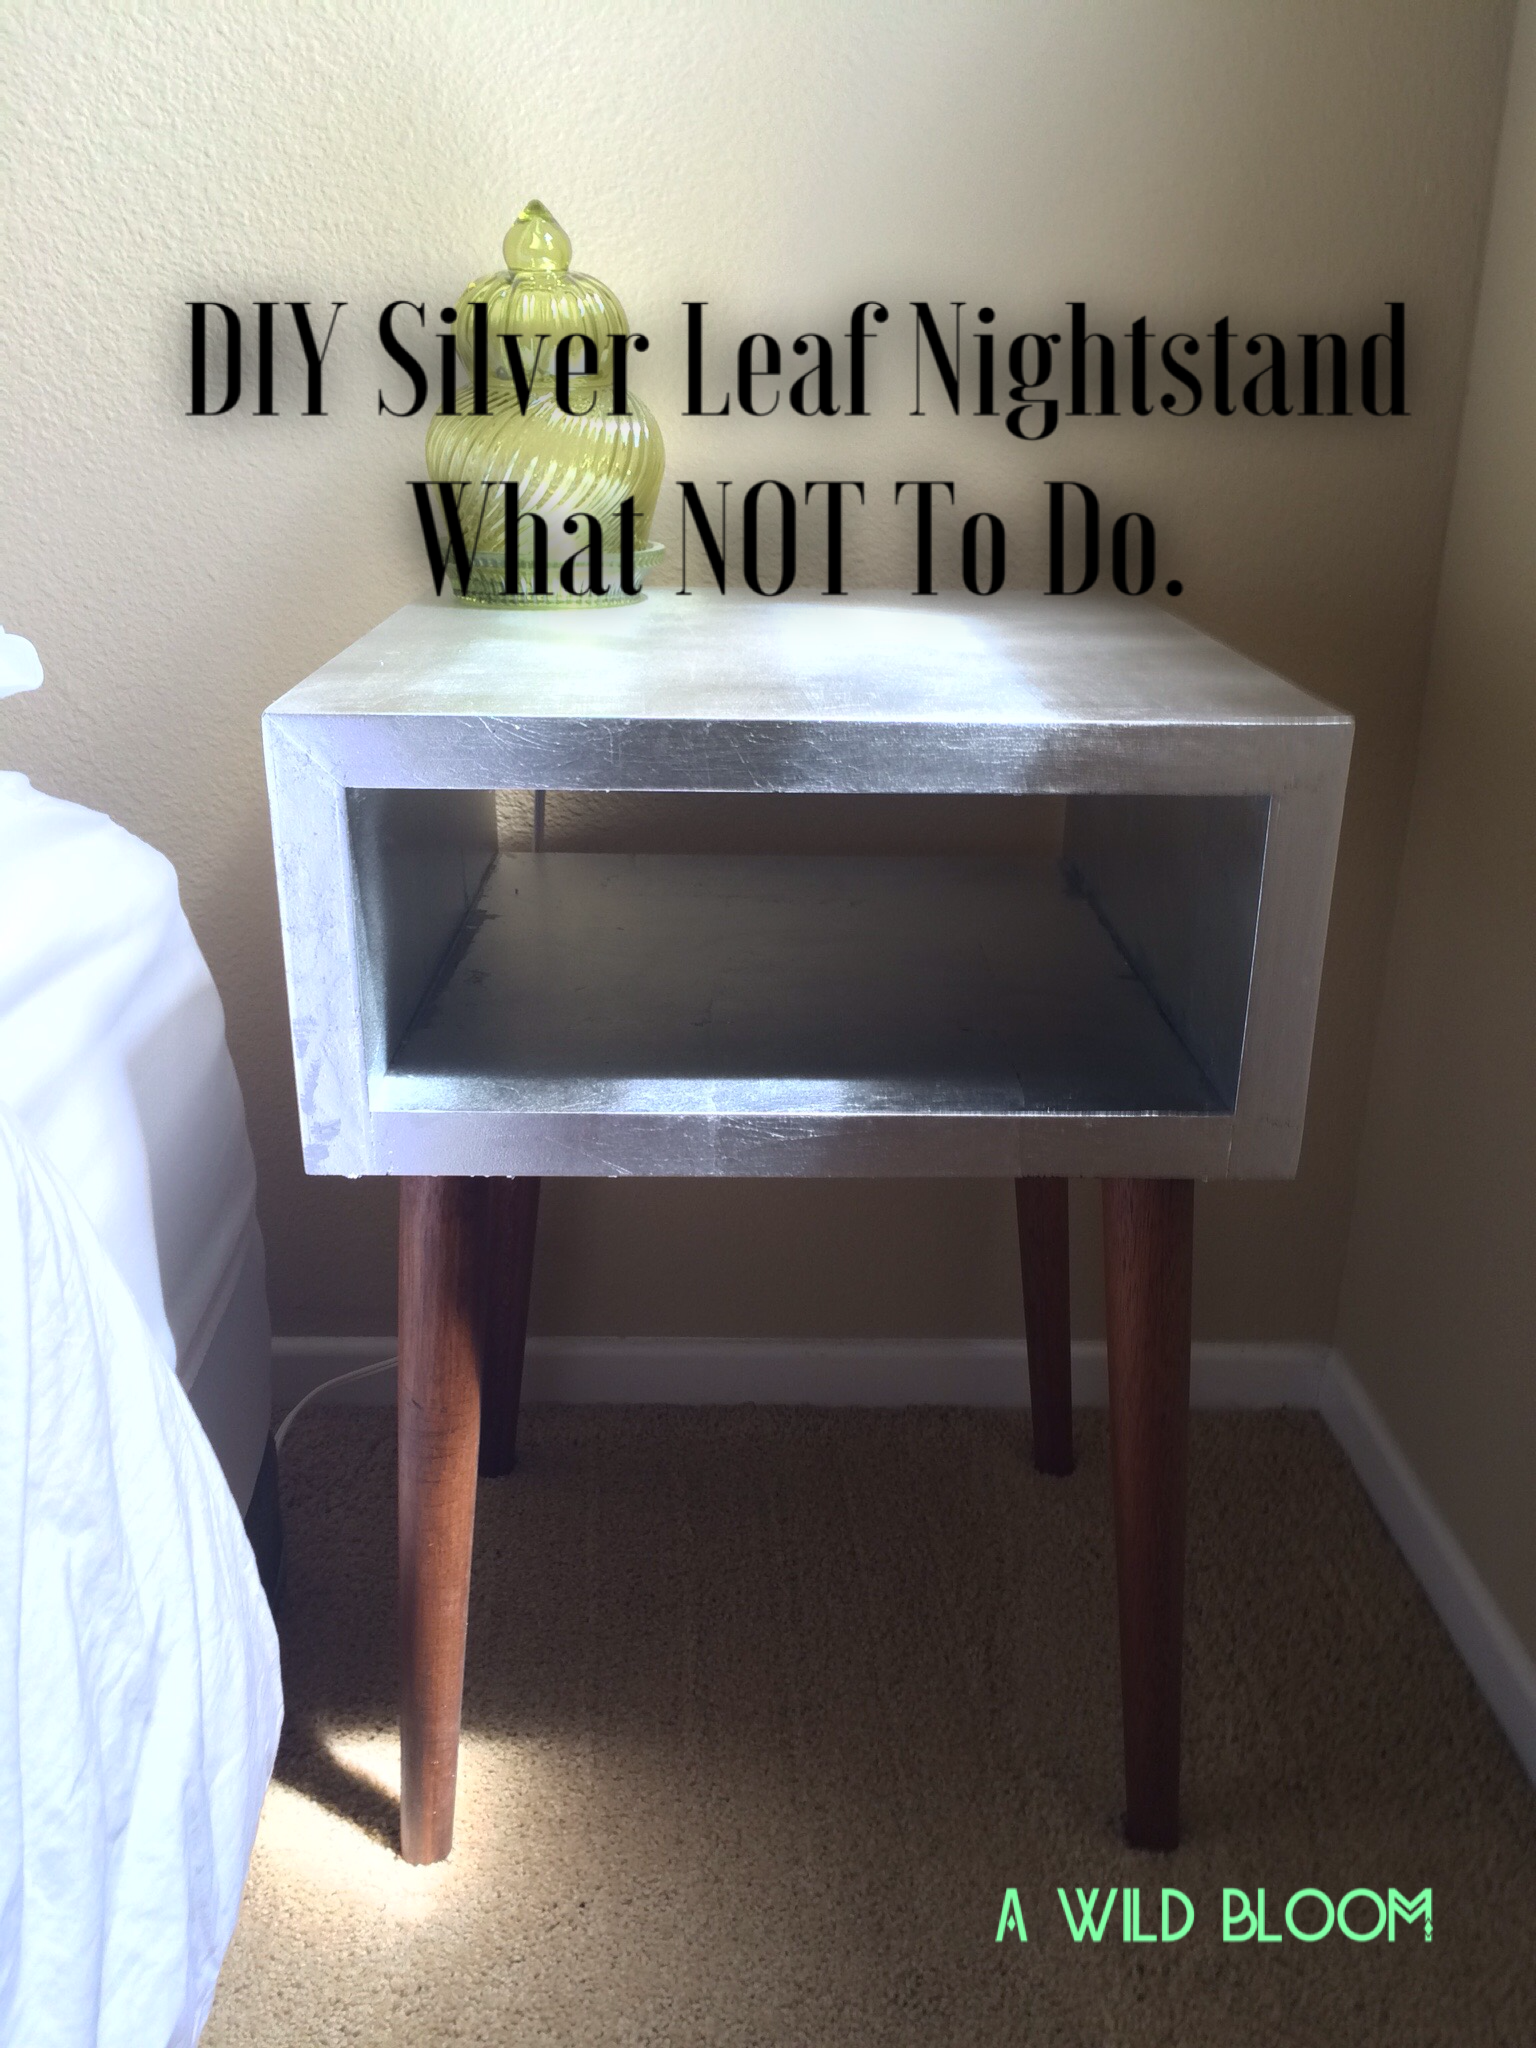
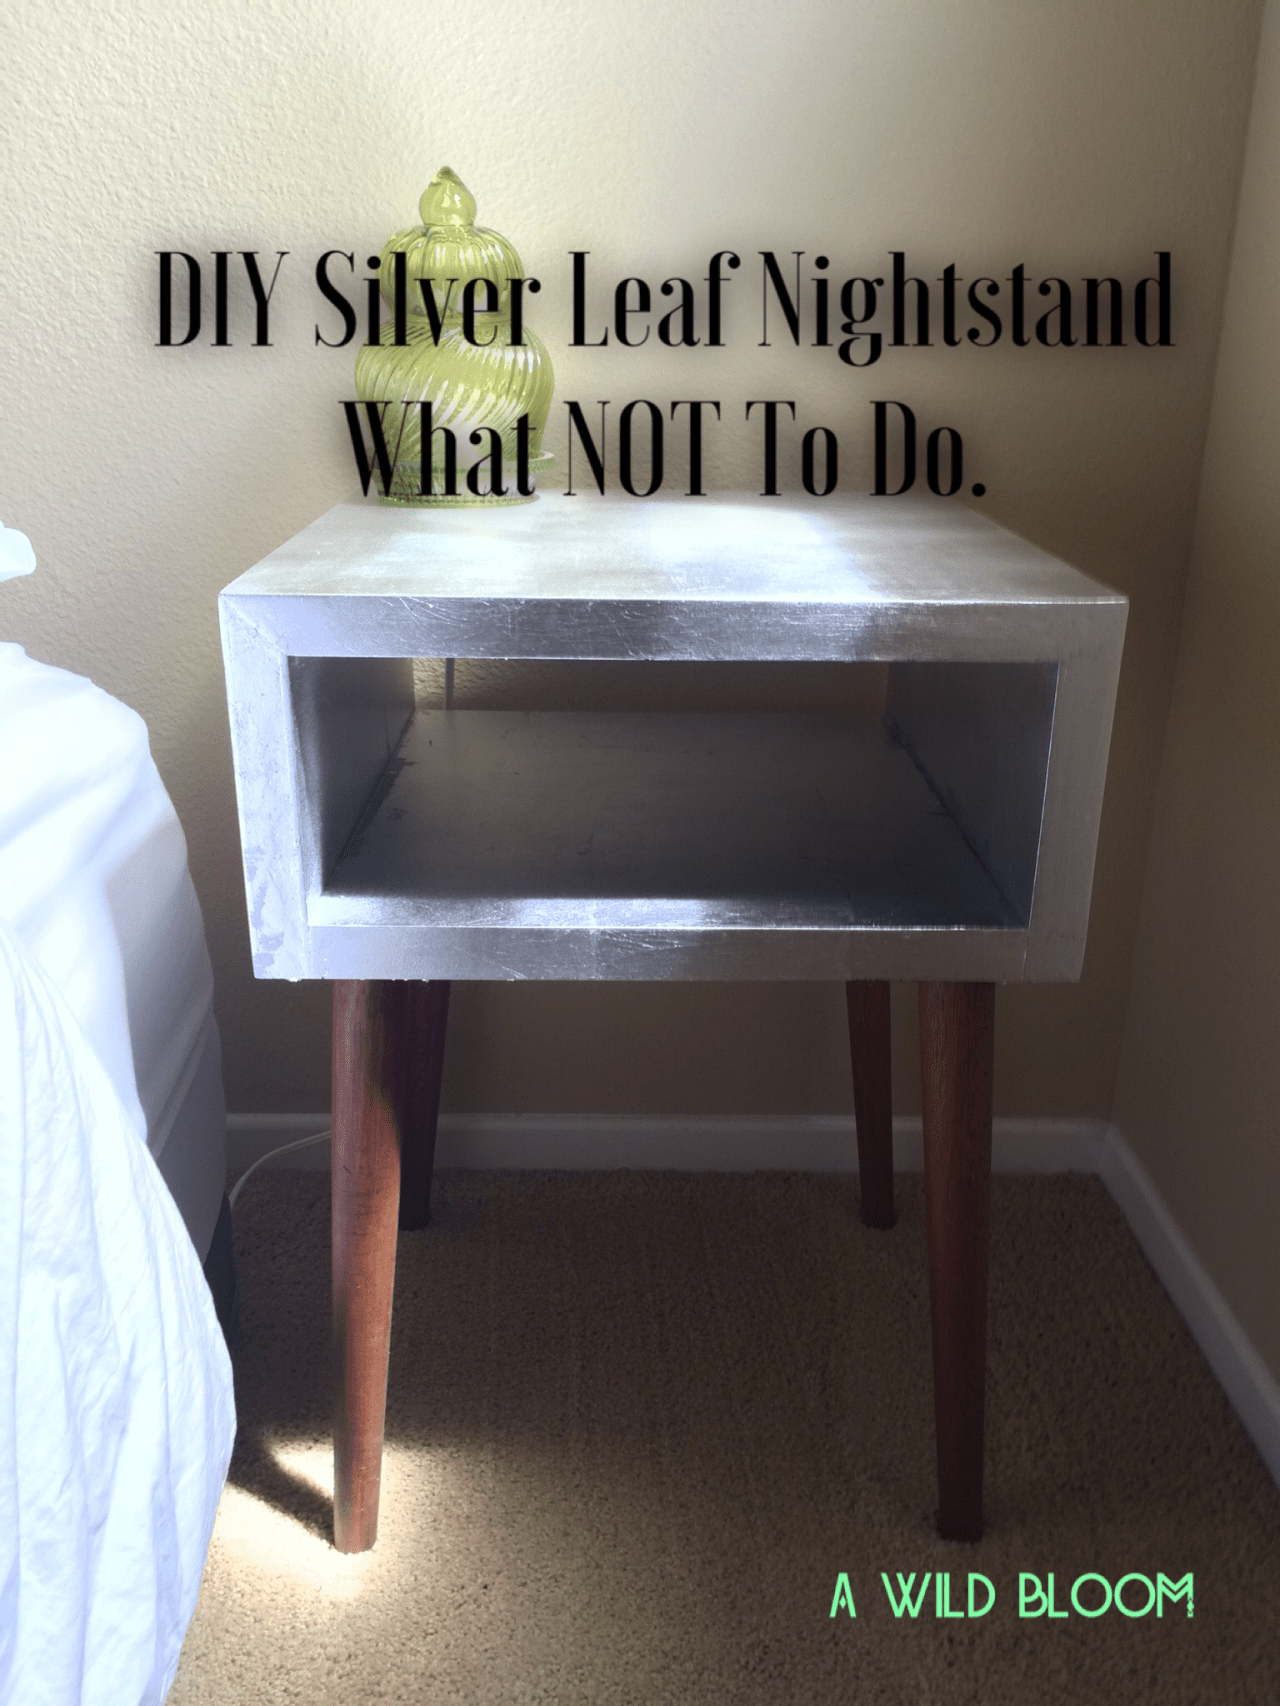
I found these awesome little tables at Target in the college section for about $50 a piece. We managed to get 10% off one of them since it was pretty beat up.

I loved the shape and the legs on the tables, but I was not so crazy about the black. Black is just so bleh to me. I want metallics and colors and GLITTER!
I decided to do a silver leaf finish on these bad boys after being inspired by this GORG gold leaf nightstand over at crab+fish.
I bought my materials mostly on Amazon and also Blick’s Art Supply.
Here’s what you’ll need:
- Tables
- Sanding Block
- Adhesive Size (Mona Lisa works great) and a Foam Brush for application
- Metal Leaf (if you’re going with silver make sure it’s the aluminum kind so that it won’t tarnish over time) I used about 70 sheets to cover my two tables.
- Stubby Natural Hair Brush
- Metal Leaf Sealant (Mona Lisa Brand)
Make sure you work in an area with a hard floor because there will be little bits of leaf EVERYWHERE.
Start off by giving your tables a light sand down and then wipe clean.
Then apply a light coat of adhesive size to your tables, making sure that you get every single spot that you want leaf to be applied. If the size isn’t there, the leaf won’t stick.

Wait 30 minutes then grab your leaf.
Starting from the middle, apply your first sheet very gently. Apply a few more pieces around your initial piece making sure to overlap them so that you don’t have any space in-between.
Take your natural hair brush and give the leaf a brush down so that it adheres to the table. DON’T brush away the excess just yet because it will fly and get stuck to the table and won’t come off, giving you bumps and a rougher finish.
Continue along until you’ve covered the whole piece. This will take a long time and some of your sheets will break and it will get a bit frustrating. But truck along and you can use any pieces that fall off to fill in holes later.
When you’re all done take your natural hair brush and brush down the whole thing to get rid of any excess bits of leaf so that you have a smooth finish all over.
Now move your tables outside or into a garage and apply your sealant. The spray is super easy to use and dries in 15 minutes so that you can do your 3 coats in no time flat.
Ta da! Now you have a gorgeous piece of metal-leaf furniture!

Now here’s a bit of advice of what NOT TO DO, as I learned the hard way.
- Go slowly when applying the leaf because the slightest wind will blow your leaf and once it is stuck to the adhesive there’s no going back.
- Make sure you have enough leaf. I started my project only to realize once I had finished the first table that I didn’t have nearly enough to finish my second one.
- DO NOT use a metal leaf paint to fill in holes and gaps. It will not look the same whatsoever and will be super duper obvious when you’re all done.
Have any of you done a metal leaf project? I wanna hear about them in the comments below! xoxo