Craigslist Dresser Transformation

I’ve been on a Craigslist binge lately. I seriously can’t believe some of the things that people are *literally* giving away for free! It’s crazy addictive and for those of us who love to customize and DIY just about everything in our homes, it is a frugal and eco-conscious way to decorate your space.

My latest find was an awesome solid wood dresser that this woman was selling for only $25! Just from the pictures alone I could tell that it was a solid, quality piece of furniture. I immediately contacted her and arranged a pick up date.

I had to borrow my friend’s truck (thanks Alyssa!) cause that thing was not about to fit into my little Prius C!

Once we got to the seller’s home (an ocean front condo in La Jolla (#jealous) I met with the woman, who by the way was so incredibly fun and spunky and was basically my spirit animal, and she showed me the dresser. We were chatting a bit and she asked me what I do for a living and I said “Oh I’m a professional dancer and teacher.” It took her less than a second to respond with “Oh my gosh you’re an artist!? Take the dresser for free!” WHAT?! I was floored by her generosity and appreciation for artists; it was a breath of fresh air to meet someone who values the arts so enthusiastically.

I tried again and again to pay her for the dresser but she refused, and then continued to show me things she wanted me to take! She was in the middle of moving to another condo down the street that was higher up with an even BETTER view, yeah, it’s a tough life haha. I ended up leaving with the dresser, a storage ottoman, 2 rugs, an assortment of beautiful pillows and blankets, kitchen ware, and a GORGEOUS capiz-shell chandelier that I have been eyeing at Pottery Barn for like 3 years! And all for FREE.

I must have had some amazing Craigslist karma cause that day was a dream. ❤

Anyways, on to the transformation!

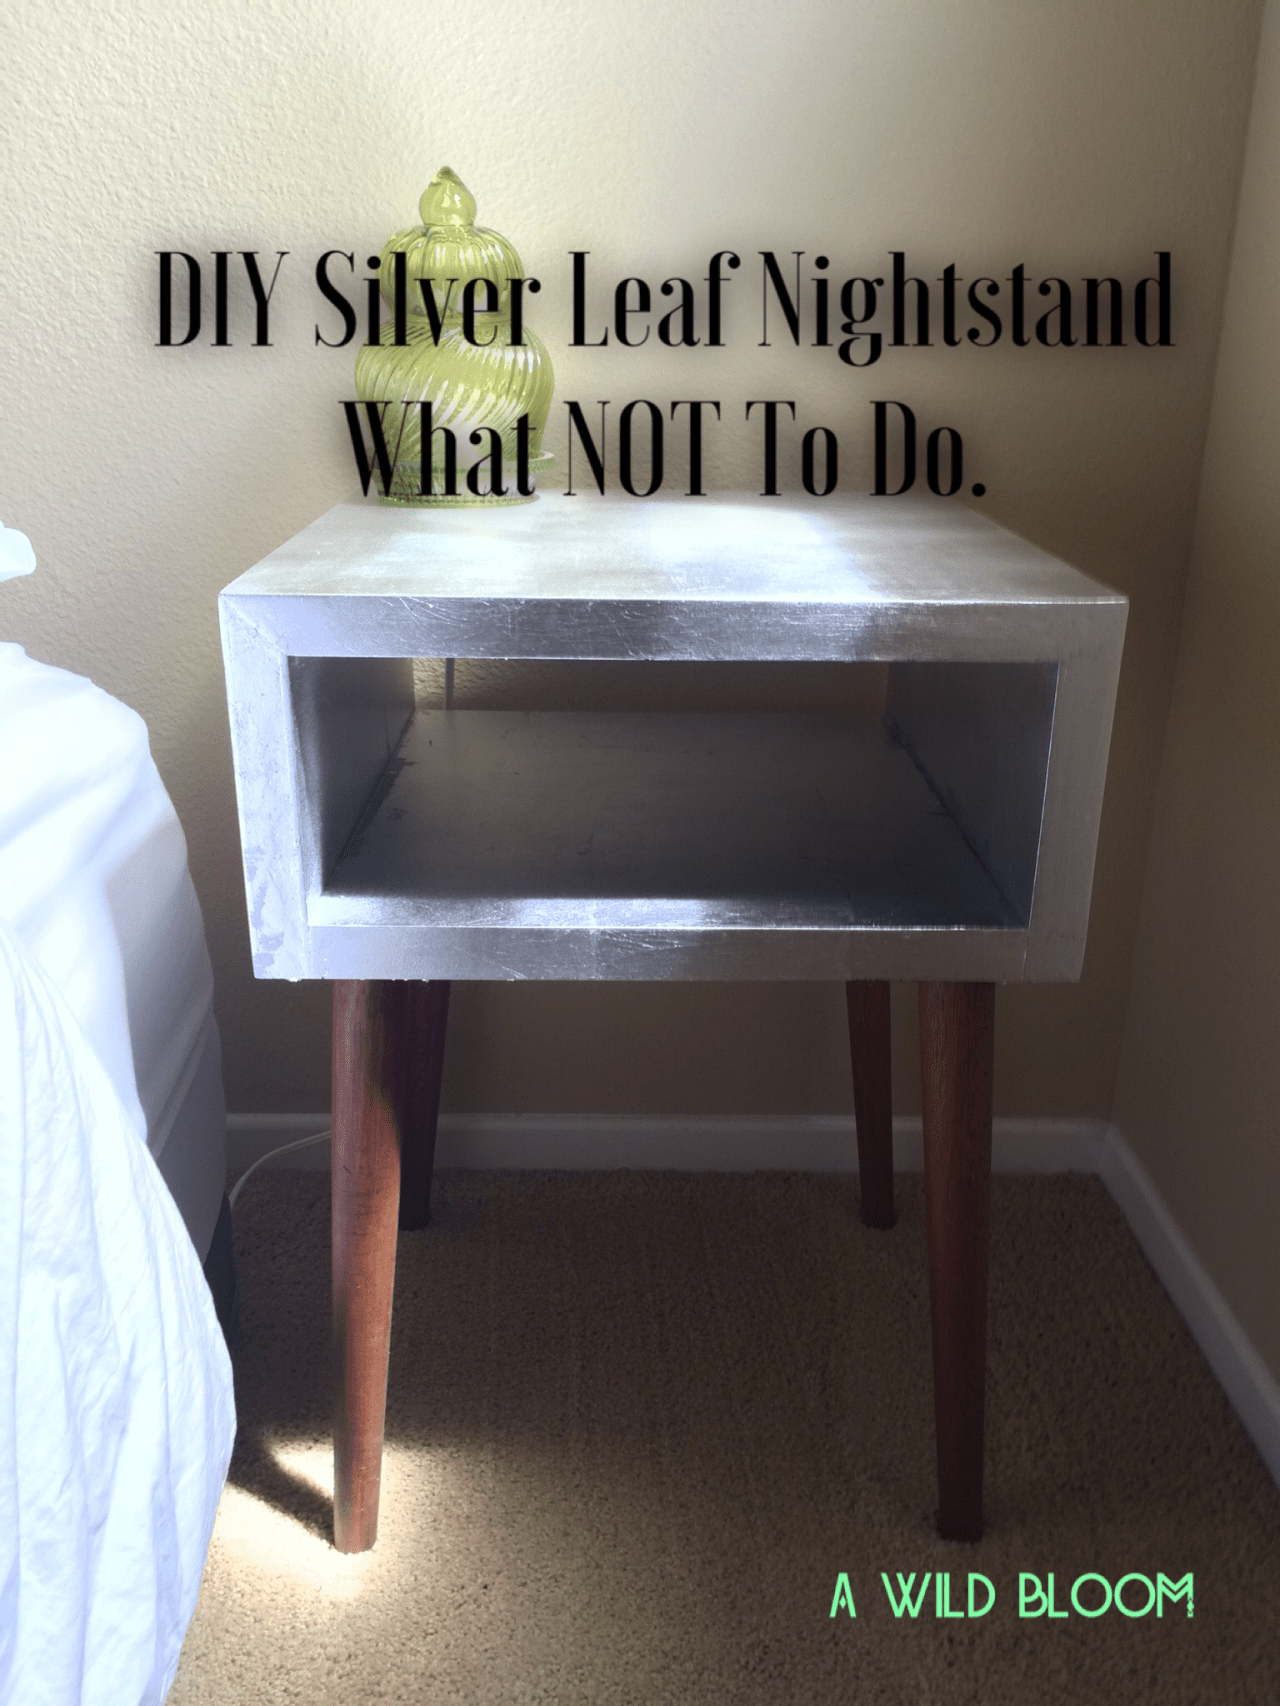
Here is the before picture:

img_9355
Brown. Basic. Ugh.

And here is what I turned it into:

img_9356

Super cute right?!

Here’s the materials and methods I used:

Materials:

  • Dresser
  • Sanding Block (I used 220 grit)
  • Primer (I used a Kilz primer)
  • 1 Quart of Paint (I went with the color “Light Quartz” by Benjamin Moore Advanced)
  • Painting Supplies (foam brushes, foam rollers, drop cloth)
  • Hardware for Drawers

Method:

  1. I started by removing the old hardware and sanding down the whole thing with my sanding block and then wiping it all down with a wet cloth to make sure there was no dust left behind.
  2. Next I primed everything with a nice thick coat of primer. I used a foam roller to do all the large surfaces and then a small foam brush to get into all the tiny details.  
  3. Allow the primer to dry and then apply 4 coats of paint. I did this many because my color was the faintest shade of pink and it really took all the coats to get to the color that I wanted. The first couple coats just looked white to me.
  4. Allow the paint to cure (about 16 hours).
  5. No top coat needed! The great thing about the Benjamin Moore Advanced paint is that it levels and hardens to a furniture quality almost lacquer like finish. Super durable and smooth.
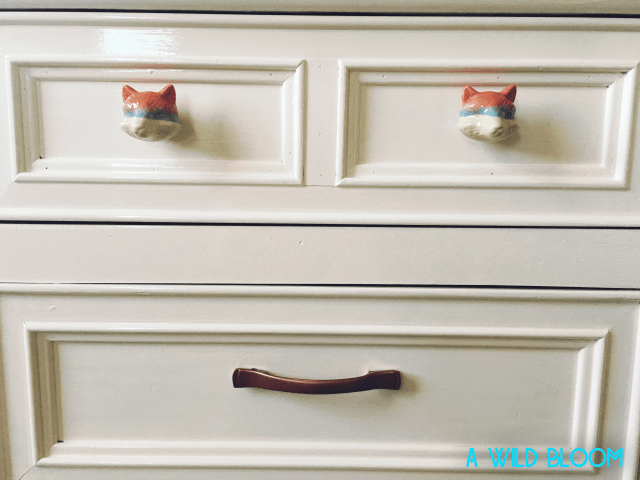
  6. Attach your hardware. I found mine at Anthropologie and they were on sale for only $5 a piece! I freaked out when I saw the price cause the other knobs I was looking at were $20 a piece. Not exactly in my budget.  Slash these are too freaking adorable!For the bottom drawers I ended up spray painting the pulls a metallic copper by Krylon to help bring out the pink tones in the paint.
  7. Admire your beautiful new piece of furniture!

IMG_9357.PNG
Pretty awesome am I right?!

The project is really simple and easy to do, just a little time consuming as you have to wait 16 hours between each coat of paint. It took me a week to complete this project, painting about an hour each day. And the whole thing only cost me about $80 to do!

img_9358
What do you think? Do you have any Craigslist furniture transformations? I’d love to see them!

xoxo

Advertisement

DIY Silver Leaf Nightstand. What NOT To Do.

Here’s another DIY project I took on this last week to share with you guys.

I found these awesome little tables at Target in the college section for about $50 a piece. We managed to get 10% off one of them since it was pretty beat up.


I loved the shape and the legs on the tables, but I was not so crazy about the black. Black is just so bleh to me. I want metallics and colors and GLITTER!

I decided to do a silver leaf finish on these bad boys after being inspired by this GORG gold leaf nightstand over at crab+fish.

I bought my materials mostly on Amazon and also Blick’s Art Supply.

Here’s what you’ll need:

  • Tables
  • Sanding Block
  • Adhesive Size (Mona Lisa works great) and a Foam Brush for application
  • Metal Leaf (if you’re going with silver make sure it’s the aluminum kind so that it won’t tarnish over time) I used about 70 sheets to cover my two tables.
  • Stubby Natural Hair Brush
  • Metal Leaf Sealant (Mona Lisa Brand)

Make sure you work in an area with a hard floor because there will be little bits of leaf EVERYWHERE.

Start off by giving your tables a light sand down and then wipe clean.

Then apply a light coat of adhesive size to your tables, making sure that you get every single spot that you want leaf to be applied. If the size isn’t there, the leaf won’t stick.


Wait 30 minutes then grab your leaf.

Starting from the middle, apply your first sheet very gently. Apply a few more pieces around your initial piece making sure to overlap them so that you don’t have any space in-between.

Take your natural hair brush and give the leaf a brush down so that it adheres to the table. DON’T brush away the excess just yet because it will fly and get stuck to the table and won’t come off, giving you bumps and a rougher finish.

Continue along until you’ve covered the whole piece. This will take a long time and some of your sheets will break and it will get a bit frustrating. But truck along and you can use any pieces that fall off to fill in holes later.

When you’re all done take your natural hair brush and brush down the whole thing to get rid of any excess bits of leaf so that you have a smooth finish all over.

Now move your tables outside or into a garage and apply your sealant. The spray is super easy to use and dries in 15 minutes so that you can do your 3 coats in no time flat.

Ta da! Now you have a gorgeous piece of metal-leaf furniture!


Now here’s a bit of advice of what NOT TO DO, as I learned the hard way.

  1. Go slowly when applying the leaf because the slightest wind will blow your leaf and once it is stuck to the adhesive there’s no going back.
  2. Make sure you have enough leaf. I started my project only to realize once I had finished the first table that I didn’t have nearly enough to finish my second one.
  3. DO NOT use a metal leaf paint to fill in holes and gaps. It will not look the same whatsoever and will be super duper obvious when you’re all done.

Have any of you done a metal leaf project? I wanna hear about them in the comments below! xoxo

DIY Crate Desk for $100

Hello friends!

I’ve been wanting a desk for my living room now for a few weeks and I finally decided to just make one.


All the desks in the stores were either way too pricey or just not my style.

I was inspired by this desk I found on Pinterest and knew that Michael’s carries crates that would be perfect.

Here’s what you’ll need:

  • 4-6 Crates (depending on how high you want the desk, I used 6 to get it to bar-height)
  • A Desk Top from Ikea
  • 1 2×4 Wood Plank
  • Wood Glue (Gorilla Glue)
  • Sander & Paint Supplies
  • Paint & Polyurethane (optional)

I got my crates from Michael’s and lucky for me it was the Labor Day sale! So I got 40% off one crate and then the clerk gave me 20% off my whole purchase! Score!

Tip: Download the Michael’s mobile app, they ALWAYS have 40% off coupons and other deals on there!

The desk top from Ikea was about $30. But they had a smaller one that was only $9!!! I would’ve gone with that one but it would’ve been way too small for me.

I decided to paint all my crates white for a rustic feel, and then paint the desk top a gorgeous metallic Rose Chrome color by Martha Stewart for a hint of glam.

Sand down your desk top first and apply a primer before applying your paint and then finally polyurethane. (I used some leftover primer and polyurethane from my DIY Farmhouse Table)

For the crates I started by spray painting them with Rust-oleum’s Universal Paint and Primer. And let me tell you it didn’t do diddly squat. It gave the crates a kind of white-washed look, but I wanted them to be solid white. So I nixed the spray paint and bought some straight up white paint and applied it with a roller and brush.


Once all of your painting is done assemble your crates by glueing them together with some wood glue (Gorilla Glue works great).

Next measure the height of your crates and cut your wood plank to size to create two support beams.  I painted mine white to match.

And then finally either glue your desk top to the crates or just lay it on top. Add your support beams to the front or back with glue and you’re all done!


Now you have a stunning custom piece of furniture for half the price of a store-bought desk!

I found the super cute magazine files and organizing bins at Ikea for less than $10. The trash can is also Ikea just spray painted a metallic gold! Finally the bomb white barstool is a Craigslist steal for only $50!

Enjoy lovelies! xoxo

Find the tutorial on how to make the charging station here!

(I tucked a power-strip under the top crate on the left so that it keeps all the cords off the floor and so that my cords for the charging station are long enough to reach easily.)